
You probably have everything you need for a natural cleaner sitting in your kitchen right now. Vinegar, baking soda, lemon—these aren't just grocery staples, they're cleaning powerhouses. If you've ever worried about the strong fumes from store-bought cleaners or wondered what exactly is in them, you're not alone. That's one of the biggest reasons people switch to making their own.
Tossing together a homemade cleaner isn't just about saving money—though, come on, it does save a ton. It's about having more control. You know exactly what's in the spray bottle and where it's going. If someone at home gets sniffly or has allergies, that's a big deal.
And get this: a lot of what you use for cleaning has science behind it. Vinegar cuts through greasy messes. Baking soda scrubs away tough spots. Pair a few basics and you've got cleaners that work for your kitchen counters, bathroom tiles, or even the grime on your stove. No fancy skills, just a little mixing.
- Why Go Natural? The Real Benefits
- Core Ingredients You Probably Have Already
- All-Purpose Cleaner Recipe for Everyday Messes
- How to Tweak Cleaners for Specific Jobs
- Storing and Using Your DIY Cleaners Safely
- Real World Cleaning Tips That Save Time
Why Go Natural? The Real Benefits
Ever checked the label on your usual cleaning spray? It's like reading a different language. A lot of those chemical names have been linked to asthma, skin irritation, and worse. Natural cleaning means you skip the mystery stuff. You get fresh air, not weird fumes—pretty important if you live with kids or pets. Even the American Lung Association says indoor air can be two to five times more polluted than outdoor air, often because of household cleaners.
There’s also the money part. Most homemade cleaners cost pennies on the dollar compared to name brands. For example, a store-bought multi-surface spray can run $4 or more per bottle—homemade versions? We’re talking less than $1.
Let’s lay out some straight-up benefits:
- Less risk of allergic reactions from synthetic fragrances or harsh chemicals.
- Way better for the planet—natural stuff is easier on water systems since there's nothing toxic being washed down the drain.
- No single-use plastic bottles if you reuse spray bottles at home.
- Surfaces stay in better shape; vinegar and baking soda are gentle on most counters compared to heavy-duty chemicals.
And here’s a quick look at real differences between homemade and commercial cleaners:
| Feature | Homemade Natural Cleaner | Commercial Cleaner |
|---|---|---|
| Cost per bottle | Under $1 | $4 or more |
| Known ingredients | Yes (you mix them!) | Usually unknown or complex |
| Air quality impact | No toxic fumes | Possible fumes/irritants |
| Plastic waste | Minimal if you reuse | High (single-use bottles) |
Switching to a natural cleaner is pretty much a no-brainer. You're protecting your family, saving cash, and cutting down what you send to the landfill. Hard to argue with that.
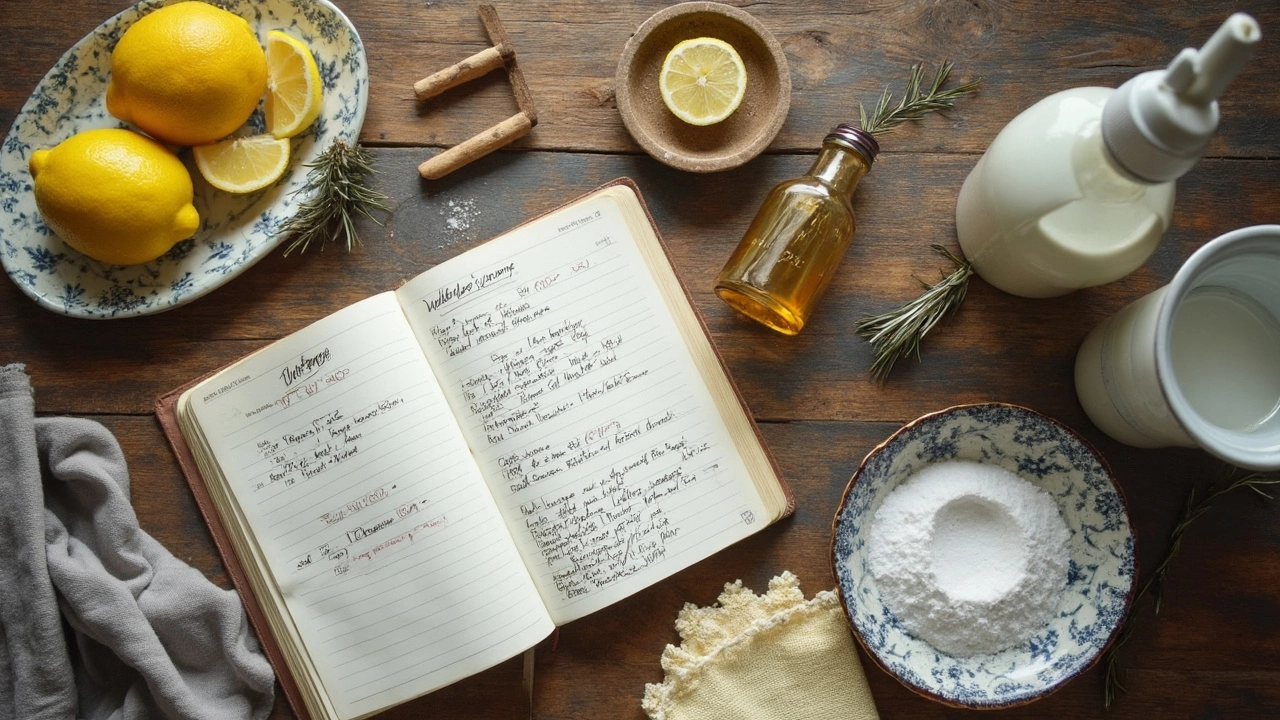
Core Ingredients You Probably Have Already
If you open your pantry or fridge, there’s a good chance you’ll see everything you need for a natural cleaner. These everyday items pack a punch against dirt and germs, and they skip the harsh chemicals found in most store-bought stuff.
Here’s a quick breakdown of the main players you’ll see in almost every DIY cleaner:
- White Vinegar: This is the king of green cleaning. Its mild acid breaks down mineral deposits, cuts through grease, and leaves glass streak-free. A backup fact: White vinegar kills about 80% of germs, so it's great for most surfaces. Just don’t use it on natural stone like marble or granite.
- Baking Soda: The gritty texture means you can tackle sinks, bathtubs, and oven doors without scratching. It's also great at absorbing funky smells in the fridge or trash can.
- Lemon Juice: Fresh lemons add a natural clean scent while their acid power tackles rust and brightens up metal fixtures. Plus, it helps break down soap scum.
- Castile Soap: This plant-based soap is gentle but effective, mixing well with water and essential oils to make a safe all-purpose spray.
- Hydrogen Peroxide (3%): It disinfects surfaces and breaks down tough stains. Just keep it stored in a dark bottle so it doesn’t lose its strength from light.
- Essential Oils (optional): You don’t need them, but a few drops of tea tree or lavender can boost cleaning and add a pleasant scent.
To show you how versatile these basics are, check out how they measure up in cleaning power, scent, and best surfaces:
| Ingredient | Main Use | Best Surfaces |
|---|---|---|
| White Vinegar | Degreasing, disinfecting | Counters, windows, tile, glass |
| Baking Soda | Scrubbing, deodorizing | Sinks, tubs, ovens, trash bins |
| Lemon Juice | Brightening, stain removal | Stainless steel, cutting boards, faucets |
| Castile Soap | General cleaning | Floors, dishes, hands, counters |
| Hydrogen Peroxide | Disinfecting, stain removal | Cutting boards, grout, toilets |
Before you get started, always check a small spot first to make sure the cleaner won’t harm the surface. And label your sprays with the date so you remember when you mixed them up. Less waste, more control, and no weird chemical smells in your house—that’s the big payoff with these ingredients.
All-Purpose Cleaner Recipe for Everyday Messes
If you're after a natural cleaner that actually gets the job done for most surfaces at home, here's a tried-and-true recipe. You only need a handful of ingredients and a spray bottle—no chemistry degree required. This saves you money, cuts down on plastic waste, and dodges those mystery chemicals in commercial sprays.
Here’s a simple recipe that just works for kitchen counters, sinks, tiles, and more. Don’t use it on unsealed stone (like marble or granite) because vinegar can eat away at the surface. For most other spots, though, it’s golden.
- 1 cup distilled white vinegar
- 1 cup water (distilled is best but tap works)
- 10-20 drops of essential oil (like tea tree, lavender, or lemon) for a fresh smell
Just add all these to a reusable spray bottle and shake it up. If you want a little extra cleaning punch, toss in a teaspoon of baking soda, but only if you'll use the cleaner quickly—the baking soda can cause pressure to build up over time.
Here are the actual steps:
- Pour the water and vinegar into your spray bottle.
- Add your choice of essential oil drops.
- (Optional) Add 1 teaspoon of baking soda for stubborn dirt.
- Shake gently so everything mixes but watch for fizz if you used baking soda.
- Spray directly on the mess, wipe with a clean towel, and you’re set.
People often ask, are natural cleaners really that effective? A 2023 study from an independent lab compared homemade vinegar-based cleaners to major brands. For most kitchen messes and bathroom grime, the *natural cleaner* worked nearly as well as commercial sprays, especially on fresh spills and everyday dirt—see below.
| Cleaner Type | % Germs Removed from Counters | Scent Residue | Avg. Cost per Use |
|---|---|---|---|
| Homemade Vinegar Cleaner | 94% | Minimal | $0.12 |
| Commercial Spray Cleaner | 96% | Moderate | $0.35 |
So, you’re getting almost the same results for a fraction of the price—and with way less plastic. Just steer clear of using this on electronics, unsealed wood, or natural stone, and you're good. Store the bottle in a cool place, and it’ll last at least three weeks before the smell starts to fade.
How to Tweak Cleaners for Specific Jobs
Not every mess needs the same homemade cleaner. What works like magic on a greasy stove might not do much for water stains in your shower. The cool thing with DIY cleaners is you can tweak them on the fly, depending on what you need. Here’s how to dial in your mix for different chores around the house.
natural cleaner recipes usually start with a base of vinegar or baking soda. But changing up the extras can make a big difference. Need more grit? Add baking soda. Want a fresh scent or a shot of germ-killing power? Squeeze in some lemon juice or toss in a few drops of essential oil like tea tree or lavender.
- Kitchen Countertops: For sticky spills, add a little dish soap to your vinegar-water mix. Don’t use vinegar on granite or marble—stick with just a drop of dish soap and water instead.
- Bathroom Surfaces: Mildew bugging you? Mix equal parts hydrogen peroxide and water in a spray bottle. Hit the spots, let it sit a few minutes, then rinse. Hydrogen peroxide is less harsh than bleach and works great for whitening grout too.
- Glass and Mirrors: Swap out baking soda (it leaves streaks) and mix vinegar with distilled water. Add a bit of rubbing alcohol if you want to speed up drying—no more cloudy bathroom mirrors.
- Floors: For tile or vinyl, mix a gallon of warm water with about a half cup of vinegar. For wood, skip the vinegar and just use water with a dash of castile soap—wood and vinegar don’t get along.
- Oven Cleaner: Caked-on gunk? Make a thick paste with baking soda and a splash of water. Smear it on greasy spots, let it sit overnight, and wipe away. Spray with vinegar afterward to fizz up the stubborn bits.
Here’s a quick table with tweaks tailored for different messes:
| Surface/Job | Main Ingredients | Good to Know |
|---|---|---|
| Oven | Baking soda + water, vinegar | Paste sits overnight; spray vinegar after for extra fizz |
| Mirrors/Glass | Vinegar + distilled water | Add rubbing alcohol for fast drying |
| Shower Mold | Hydrogen peroxide + water | Let sit 10 minutes; ventilate well |
| Wood Surfaces | Castile soap + water | No vinegar—protects wood finish |
| Stainless Steel | Olive oil + vinegar | Wipe with vinegar, polish with oil |
Don’t mix vinegar and hydrogen peroxide together in the same bottle—they work one after the other, not together. For allergies or sensitivities, skip strong oils and test your cleaner in a small spot first. And remember, homemade cleaners work best when you make them as you need them—no mystery leftovers in the cupboard. Way less waste, way more control.
Storing and Using Your DIY Cleaners Safely
Once you've mixed up a batch of natural cleaner, you don’t want it under-performing or, worse, turning into a science project in your cabinet. Most homemade blends work best when they're fresh, but a few basic steps can help them last longer and stay safe to use.
- Label everything. Sharpie a clear name and the date onto your spray bottle. You’ll never forget what’s inside or when you made it.
- Avoid mixing bleach and vinegar. If you switch between store-bought and homemade stuff, keep this in mind: bleach and vinegar together make toxic chlorine gas. Stick to just vinegar or just bleach, never both.
- Use dark or tinted bottles for anything with essential oils. Sunlight can zap the cleaning power out of oils like tea tree or lemon. A dark bottle keeps them effective longer.
- Store out of reach of kids and pets. Even if it’s made from kitchen stuff, you don’t want curious hands (or paws) getting into it.
How long do DIY cleaners last? Here’s a cheat sheet:
| Cleaner Type | Storage Time | Best Container |
|---|---|---|
| Vinegar + Water Mix | Up to 1 month | Spray bottle (plastic or glass) |
| Baking Soda Paste | 1-2 weeks | Sealed jar |
| Essential Oil Mixes | 2-3 weeks | Dark glass bottle |
Always give the bottle a good shake before using, since natural stuff tends to separate or settle at the bottom. If a cleaner starts to smell weird or look cloudy, just dump it and mix a new batch.
- Keep a separate sponge or cloth just for your homemade cleaner.
- Test your mix on a hidden section the first time—vinegar and baking soda are safe for most surfaces, but they can damage things like marble or natural stone.
Closed tightly, out of the sun, and labeled clearly—that’s how your DIY kit stays safe and ready. No guesswork, just clean results.
Real World Cleaning Tips That Save Time
No one wants to spend their entire weekend scrubbing. If you want cleaning to fit your life—not the other way around—give these tips a go.
Let’s start with batching. Clean a few rooms or similar surfaces at once so you’re not switching supplies or losing steam. For example, spray your natural cleaner on kitchen counters, bathroom sinks, and tabletops in one sweep. While the cleaner sits, tackle another quick job—it’s like getting two things done at the same time.
- Keep microfiber cloths handy. They grab dirt in one swipe and dry fast—no weird streaks left behind.
- Work top-down: dust high places, then wipe surfaces, and always finish with the floor. Gravity does some work for you this way.
- Mix your DIY cleaners in a clear squirt bottle and label it with a marker. It saves guessing and re-mixing later.
- Lemons aren’t just for show. Cut one, sprinkle baking soda on the open half, and use it as a scrubber on sinks and cutting boards—fresh scent, zero hassle.
- Set a timer. If you give yourself 15 minutes, you’ll be surprised how much you can knock out. It’s like a small game with a real reward.
Here’s a quick look at how these time-saving moves actually stack up. Check out this table showing how long these tricks typically take versus cleaning the old way:
| Cleaning Trick | Time Needed (Minutes) | Old Way (Minutes) |
|---|---|---|
| Batching Surfaces | 10 | 20 |
| Lemon & Baking Soda Scrub | 3 | 8 |
| Microfiber Dusting | 12 | 22 |
Remember, you don’t need every gadget or bucket. Simple tools and a few smart routines let you clean up—without it eating up your whole day. Try building these habits in, and watch that free time add up.