Every time you think you’ve finally nailed cleaning your windows, those annoying streaks show up again. Turns out, getting totally streak-free glass isn’t about buying the fanciest spray at the store. It’s about using the right tools, the right cleaner, and, honestly, the right technique. Skip those paper towels (they just smear stuff around) and don’t fall for the hype about washing windows on a sunny day—it actually makes things worse.
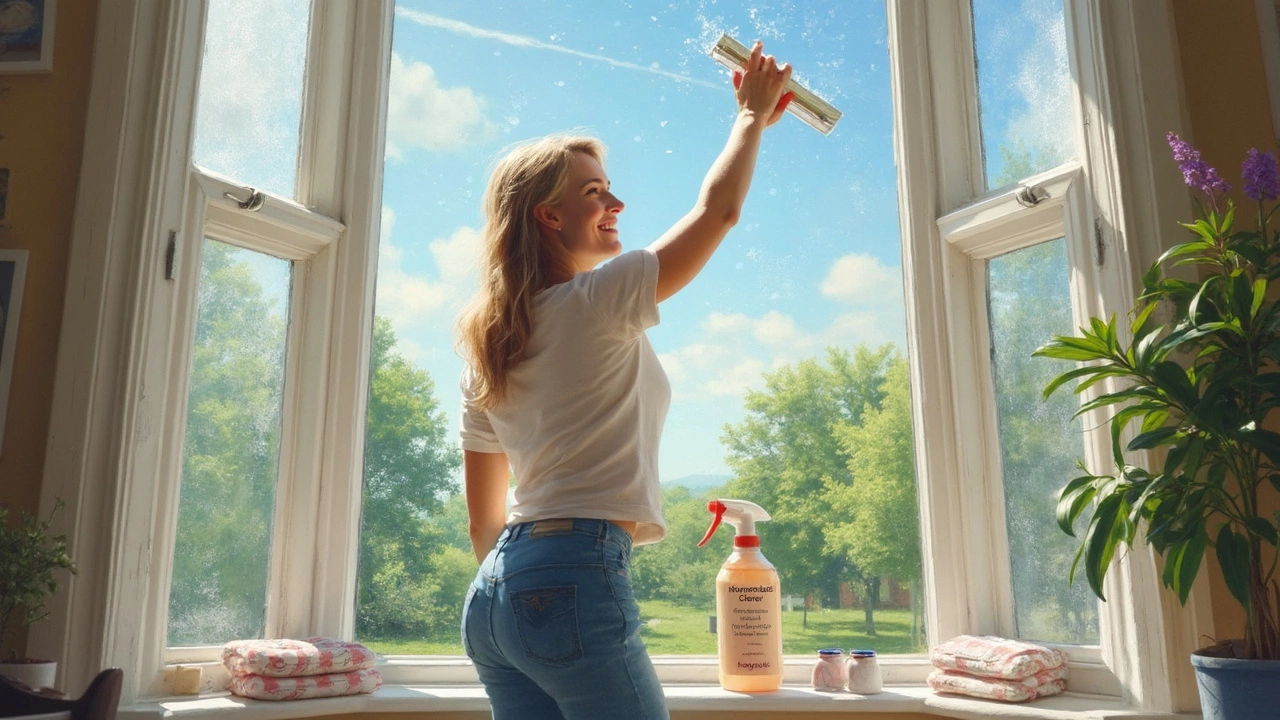
If you’re tired of wasting time wiping the same spots over and over, you need a practical method that just works. You want fast results and spotless windows. There’s a reason pro window cleaners always have a squeegee with them. The squeegee is the real game-changer that wipes away cleaning solution and dirt in one swipe, leaving glass so clear you’ll almost walk into it.
But wait—you don’t need a carload of special supplies. You probably have what you need at home already. You’ll learn a few surprising hacks with stuff in your kitchen, along with what you should absolutely avoid unless you love streaks and lint stuck to your glass. Ready for the inside scoop on what actually works for windows? Stay tuned—your windows are about to get a serious upgrade.
- Why Do Windows Get Streaks?
- The Right Tools for a Streak-Free Shine
- Best Homemade and Store-Bought Cleaners
- How to Actually Clean Windows Step-by-Step
- Common Mistakes That Cause Streaks
- Tips for Keeping Windows Clean Longer
Why Do Windows Get Streaks?
Streaks are the arch-enemy of anyone chasing that perfectly clean window. But what actually causes them? It’s usually a combo of stuff left behind—soap residue, hard water, dirt, or lint. Honestly, most folks are using the wrong tools or the wrong technique, which just drags muck around instead of picking it up.
One of the biggest offenders is using paper towels. They break down fast and leave tiny fibers—a recipe for streaky mess. Plus, “spray and pray” doesn’t cut it. Dumping on cleaner and hoping for the best just means leftover liquid dries right on the glass, especially if the sun’s beating down and evaporates the mix before you can wipe it off. Fun fact: Window cleaning manufacturers estimate about 57% of people apply too much product, which means more wiping and more chance for streaks.
There’s also the problem of water quality. Tap water often has minerals (think calcium and magnesium). When this dries on glass, it shows up as those chalky, white lines. And if you’re using soap, any leftover suds that don’t get wiped away will just harden into streaks once the surface dries.
| Common Streak Causes | Result |
|---|---|
| Too much cleaner | Residue dries as streaks |
| Poor-quality towels | Fibers and lint left behind |
| Hard water | Chalky, spotty lines |
| Not rinsing properly | Soap or cleaning mix hardens |
| Sunny or hot weather | Cleaner dries too fast |
Want a clean result? Use fewer chemicals, better tools, and just a bit of elbow grease. If you rely on a good squeegee and approach it step-by-step—like the pros do—streaks turn into yesterday’s problem. The key is using a proven window cleaning method and drying the glass before anything can sit and dry into a mess.
The Right Tools for a Streak-Free Shine
Trying to get spotless glass but only using paper towels and any old spray? No wonder you end up with lint and marks everywhere. Getting streak-free windows actually comes down to the tools you use. This isn’t just hype—pro window cleaners have basically the same setup at homes and skyscrapers.
If you want to level up, start with a decent quality squeegee. Get one with a rubber blade (replace the blade when it gets nicked) and a handle that feels good in your hand. Cheap squeegees from dollar stores are usually too flimsy and leave streaks behind. For regular-sized windows, an 8-12 inch blade works great. If you have massive panes, you might want a bigger one.
Next, use a microfiber cloth or towel. Unlike paper towels or rags, these don’t leave fuzz stuck to your window. You’ll also want a simple bucket to mix cleaning solution, and if your windows are hard to reach, an extension pole saves you from risky balancing acts on ladders.
This is the basic kit that works for most folks at home:
- Squeegee (8-12 inches for most windows)
- Microfiber cloths (a few, so you can swap when one gets too wet)
- Bucket (just big enough for your squeegee and cleaning water)
- Extension pole (for those second-story jobs or tall windows)
- Spray bottle (if you prefer spraying the cleaner directly on the glass)
Some people like to use a scrubber or a sponge for stuck-on grime. That’s fine, just make sure whatever you use is non-abrasive so you don’t scratch the glass. If you really want to go pro, pros swear by BOABs (bucket-on-a-belt)—but honestly, a regular bucket works for home windows.
"A squeegee and a microfiber cloth are all you really need—anything else is just making the job harder or messier," says Chris Willingham, a pro cleaner featured in Cleanfax Magazine.
One last tip: grab a small dry cloth or rag to wipe the squeegee blade after each pass. This stops dirty water from collecting on the edge and dragging new streaks across your clean glass.
To show what works (and what fails), check out this comparison:
| Tool | Leaves Streaks? | Reusable? | Average Cost |
|---|---|---|---|
| Squeegee | No | Yes | $8-$15 |
| Microfiber Cloth | No | Yes | $1-$5 each |
| Paper Towels | Yes | No | $2/roll |
| Old Rags | Usually | Yes | Free/cheap |
If you stick with the right tools, every step after this just gets easier and results look a whole lot better. No more streaky glass or wasted effort.
Best Homemade and Store-Bought Cleaners
Plenty of fancy bottles crowd the cleaning aisle, but you don’t actually need them for perfectly clear windows. The truth is, both homemade and store-bought options can do the job. It all comes down to what’s in them and how you use them.
For a homemade cleaner, nothing beats the classic mix:
- 2 cups of water
- 1/2 cup of white vinegar
- 1/4 cup of rubbing alcohol (at least 70% concentration works best)
Mix these in a spray bottle and you’re good to go. Vinegar cuts grease and dissolves hard water stains, while alcohol speeds up drying so *streak-free windows* are actually possible. Not into vinegar? Lemon juice works as a substitute, though you’ll need to use windows soon after cleaning—lemon can leave sticky residue if it sits around.
On the store-bought side, go for something marked specifically for glass. Seventh Generation Free & Clear Glass Cleaner and Windex Original both have solid reputations because they don’t leave much behind. Avoid anything with heavy scents or additives—extra stuff just adds streaks.
Skip dish soap unless you’re chasing bug guts or heavy buildup; even a drop too much leaves a film on glass. And never use ammonia-based products on tinted windows—over time, they break down the film and can ruin what you’ve paid for.
A quick tip: always mix or shake cleaners right before use. Settled mixtures split up and don’t work as well. Also, label your spray bottles, especially with homemade stuff so you’re not spraying the wrong thing next week.
How to Actually Clean Windows Step-by-Step
Let’s keep it real: the old spray-and-wipe method with a paper towel isn’t doing your windows any favors. If you want truly streak-free results, you have to dial in your process. Here’s exactly what you need to do:
- Gather your tools: Grab a bucket, a squeegee, a microfiber cloth, your favorite glass cleaner (homemade or store-bought), a small sponge or scrubber, and some clean water. No need for fancy gear — but ditch paper towels, they tend to leave lint and streaks.
- Mix your cleaner: For homemade, go with one part distilled vinegar to ten parts warm water, add a drop of dish soap if it’s extra grimy. If you use store-bought, just make sure it’s ammonia-free – ammonia can damage window tints.
- Remove surface dust and dirt: Use a dry microfiber cloth to wipe down the frame and glass before getting anything wet. This avoids making muddy streaks later.
- Wash the glass: Dip your sponge or scrubber in the cleaning solution and work in sections from top to bottom. Be sure to cover the whole window, especially the corners where dirt hides.
- Squeegee time: Immediately after washing, start at the top and pull your squeegee straight down in a firm, steady motion. Wipe the blade with the microfiber cloth after each pass—this one little habit stops streaks from building up.
- Detail the edges: Take your microfiber cloth and run it along the edges where water and grime like to hide. This step is all about giving that crisp, spotless finish.
- Let it dry: If you see any lingering streaks, buff lightly with a dry microfiber cloth. Don’t touch the glass again once it’s fully dry or you’ll just add new prints.
Can you just clean one side? Not really. Dirt hides on both, so do inside and outside for the best results.
| Window Size | Minutes Needed |
|---|---|
| Small bathroom window | 2-3 minutes |
| Standard double-hung (each side) | 4-5 minutes |
| Patio/sliding glass door | 7-10 minutes |
Try cleaning windows out of direct sunlight—seriously, the sun dries the cleaner too fast and leaves streaks behind. And one last heads-up: always change your water once it gets cloudy. Dirty water = dirty windows, no matter how hard you scrub. If you follow these steps, your window cleaning routine will never be the same (in a good way).
Common Mistakes That Cause Streaks
If you’ve ever wondered why your windows still look cloudy or smeared after cleaning, you’re not alone. Most streaks happen because of a few slip-ups that are easy to avoid once you know what’s up. Here’s what’s really getting in the way of that crystal-clear look.
- Window cleaning on a sunny or hot day: Yep, it feels nice to be outside, but heat dries out your cleaning solution too fast. That leaves marks before you can even wipe them away. Cooler, overcast days are way better for streak-free results.
- Using paper towels: They crumble, leave fibers behind, and just move the dirt around. Go for a microfiber cloth or a squeegee instead. These pick up grime without making a mess.
- Too much cleaner: Flooding the glass seems like it’s thorough, but it often means extra wiping and more chances for streaks. Less is more. Mist the window lightly and evenly.
- Neglecting to clean your tools: Dirty cloths, old squeegee blades, or buckets full of used water all just drag old dirt across the window. Freshen up your tools before every job.
- Skipping the pre-clean: Trying to clean right over thick dirt, bird droppings, or sticky fingerprints? It just turns into a soupy mess. Always do a quick wipe to get off big debris first.
One more thing—using the wrong cleaner can totally backfire. Some glass cleaners have fancy-smelling additives or ammonia that leaves a film behind. If you’re going homemade, make sure there’s no soap residue left on the glass, or you’ll see those telltale marks as soon as the sun hits the window.
Dodge these common errors and your windows will be as clear as the advice in this article.
Tips for Keeping Windows Clean Longer
Let’s face it, nobody wants to wash their windows every week. The good news? You can make the shine last way longer with a few smart moves. It’s not just about the wipe-down—what you do afterward matters just as much as the cleaning itself. Here’s what actually works to keep that glass sparkling.
- Dust first! Wipe down the window frame and sill with a dry microfiber cloth before washing the glass. Less dust means less grime clinging to the window after you’re done.
- Seal leaks around the window frame. If you feel a draft, that’s probably letting in pollen and dirt. Use caulk or weatherstripping to plug gaps and you’ll see windows stay clean longer.
- Use a windshield treatment on exterior home windows—yep, the same spray you use for your car. These products help rain and dirt slide right off, just like they do on your windshield.
- Keep sprinklers from hitting your windows. Hard water spots stick around forever, so tilt the sprinkler heads away from the house if you can.
- Don’t overdo the cleaner. Too much of even the best window cleaner leaves residue that grabs onto dust and fingerprints.
- Make a habit to close windows on windy and rainy days—especially if you live near trees, construction sites, or pollen-heavy areas.
Want an idea of how seasonal grime, rain, and location can affect your window cleaning efforts? Check out the table below—it’s based on averages from U.S. home maintenance surveys and can help you plan your touch-ups.
| Location Type | Main Grime Source | Average Weeks Until Noticeable Dirt |
|---|---|---|
| Near urban streets | Exhaust, dust | 4-6 weeks |
| High pollen area | Pollen, sap | 2-3 weeks |
| Rainy climate | Water spots, mud | 6-8 weeks |
| Close to coast | Salt, sand | 3-4 weeks |
| Suburban/rural | Dust, insects | 6-8 weeks |
If you follow these simple habits, you’ll spend way less time cleaning, and your windows will actually look good between major cleanings. Little routines add up to a lot fewer headaches—no magic sprays necessary.