
Ever noticed how construction dust manages to sneak into every corner of your home? It doesn't just settle on flat surfaces—you'll find it floating in the air, coating light fixtures, and somehow even in the fridge. My dog Charlie once rolled on the carpet after a renovation and came out looking like a powdered donut. That's the kind of stubborn mess we’re dealing with.
The thing with post-construction dust is that it's not your usual household dirt. It's superfine, almost invisible, and it can hang in the air for days if you don't tackle it the right way. Regular sweeping or wiping does almost nothing—in fact, it can make things worse by just sending that dust cloud back into the air. The trick isn’t just cleaning—you’ve got to get that dust out of the air entirely.
- Why Construction Dust Is So Hard to Remove
- Essential Tools That Actually Work
- Step-by-Step Guide to Clearing the Air
- Mistakes That Make Dust Problems Worse
Why Construction Dust Is So Hard to Remove
Normal dust is annoying. Construction dust, though, is next level. The reason it’s so tough to remove? It’s made up of super-fine particles from drywall, plaster, cement, wood, and even tile grout. These tiny bits can be 100 times smaller than a grain of sand. Once they're airborne, they float around for days, even weeks, before they finally settle. That means more dust lands right after you think you’ve cleaned it up.
Experts have shown that freshly renovated homes can have tiny airborne particles called PM2.5 and PM10 at levels way above normal for days after the work ends. These aren’t just a cleaning nightmare—they’re rough on your lungs, too. The dust can also have silica, which is known to be pretty bad for your respiratory health if you’re exposed for long enough. According to the American Lung Association:
"Fine particles from construction sites can linger in the air and contribute to indoor air pollution, sometimes at levels more than twice what is safe for indoor living."
If you’re wondering why your regular cleaning routine barely touches this mess, here’s the reality:
- Regular vacuums usually don’t have HEPA filters, so they blow fine dust back into the room.
- Feather dusters and dry cloths just push particles around or launch them back into the air.
- Even opening a window isn’t always enough—sometimes outdoor air brings in extra dust, or there’s not enough wind to clear the room.
For anyone thinking, “It can’t be that bad,” check out this table that shows how much dust construction actually creates. (The numbers are pretty wild if you love data like I do.)
| Activity | PM2.5 Spike (μg/m³) | Duration in Air (hours) |
|---|---|---|
| Sawing drywall | 220 | 8-12 |
| Sanding wood floors | 170 | 6-10 |
| Tile cutting | 135 | 5-8 |
The bottom line? This isn’t just surface mess—this is an air quality problem. If you want post-construction dust removal to actually work, you need proper gear, and a smart game plan.
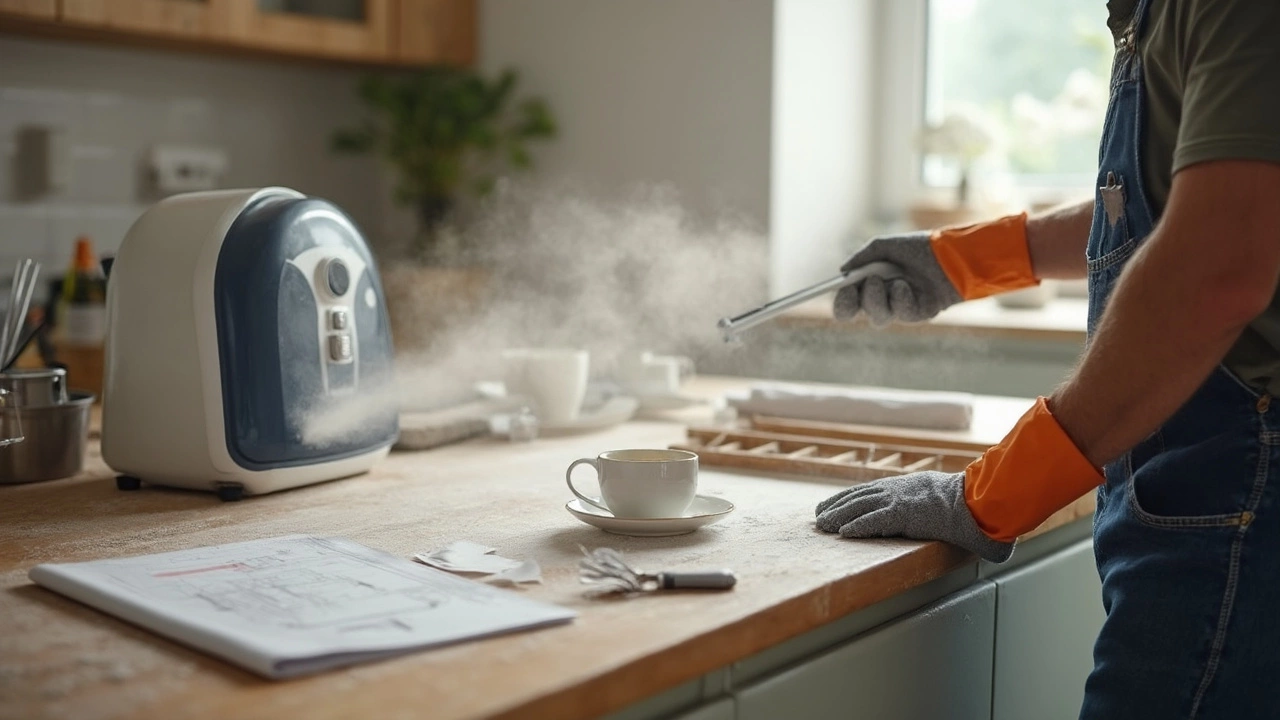
Essential Tools That Actually Work
You can’t just rely on a feather duster and good intentions to tackle dust removal after a remodel. The right tools do most of the heavy lifting. Here’s what you really need if you want to get every last particle out of your air and off your surfaces.
- HEPA Filter Vacuum: Not your everyday vacuum. Regular vacuums blow fine dust right back out. Get a vacuum with a true HEPA filter—it grabs 99.97% of dust particles, even the ones you can’t see. These filters are the gold standard for post-construction and after builders cleaning.
- Air Purifier with HEPA Filter: An air purifier running 24/7 for a few days makes a huge difference. A good one can pull the dust that’s floating around and give you a fighting chance at improving your indoor air quality.
- Microfiber Cloths: Forget regular rags—microfiber cloths actually trap dust, instead of just spreading it. Use them slightly damp for best results, especially on surfaces where dust stubbornly clings.
- Mop (With Clean Water): For floors, go with a damp mop. Skip sweeping, which stirs dust back into the air. Change the water in your mop bucket often, or you’ll just smear dust around.
- Box Fans (for Quick Air Exchange): Place box fans in windows facing out. This pulls dusty air straight outside, which is a simple hack for fast post-construction air exchange while cleaning.
- Disposable Masks: You’d be surprised how much gunk you breathe in during big cleans. Grab some masks (the N95 or KN95 types are best) to protect yourself from the fine stuff.
| Tool | Effectiveness (1-10) | Main Purpose |
|---|---|---|
| HEPA Vacuum | 10 | Pulling fine dust from floors/carpets |
| HEPA Air Purifier | 9 | Removing airborne dust |
| Microfiber Cloth | 8 | Surface dust pickup |
| Mop | 8 | Trapping dust on hard floors |
| Box Fan | 7 | Ventilating dust outside |
Skip basic shop vacs, cheap air filters, and dry sweeping—they just move dust around or make the situation worse. Investing in these proven tools is the fastest way to get clean, breathable air back in your space.
Step-by-Step Guide to Clearing the Air
Getting rid of stubborn dust removal after construction can feel like an endless job, but if you follow the right steps, it really does get easier. Here’s exactly what works—not just the stuff you see on cleaning product ads.
- Seal Off the Area First
If any construction is still going on, or if you’re just getting started with the cleanup, close doors and use plastic sheeting around the affected rooms. This keeps dust from sneaking into the rest of the house, especially places you don’t want to keep cleaning, like bedrooms or your dog’s hangout spots. - Ventilate Smart
Crack open a few windows, but don’t overdo it—especially on windy days, or you’ll just bring in more dust. Use fans facing out of windows to blow post-construction air outside, not further inside. - Use the Right Vacuum (With a HEPA Filter!)
Regular vacuums often just spit dust back into the indoor air. You need a vacuum with a HEPA filter, which traps almost all the fine particles. Go over every surface: floors, window sills, even the walls if you can. Got furniture that stayed during the reno? Hit that too. Pet beds, curtains, and rugs also collect tons of residue. - Damp Wipe—Don’t Dry Dust
For solid surfaces, grab a damp microfiber cloth and wipe down everything. Dry dusting or sweeping just makes the dust airborne again. Microfiber is a game-changer because it really holds onto the dust. - Run an Air Purifier
This step is crucial if anyone in your family has allergies or asthma. Look for an air purifier with a HEPA filter that promises to clear at least 99% of airborne particles down to 0.3 microns. Let it run for several hours each day in the recent construction zone for the best results. - Repeat Where Needed
This isn't a one-and-done deal, at least not if builders have been stirring up dust for days. Repeat vacuuming and damp wiping for up to a week, depending on how much dust removal you need.
Ever wondered why professionals focus on certain steps? Here's a quick comparison table showing which methods actually reduce dust in the air versus just moving it around:
| Method | Reduces Airborne Dust? |
|---|---|
| Sweeping | No—moves dust back into air |
| Vacuum with HEPA Filter | Yes—removes fine dust |
| Damp Microfiber Wipe | Yes—captures and traps dust |
| Dry Cloth or Feather Duster | No—just stirs up dust |
| Air Purifier with HEPA | Yes—clears particles from air |
Proper after builders cleaning is about consistency and using the right gear. Miss a step, and you’ll keep finding dust in weird spots for weeks, trust me.
Mistakes That Make Dust Problems Worse
It's easy to mess up when clearing post-construction dust removal, and a few wrong moves can leave you dealing with stubborn clouds for weeks. Let’s cut to the chase—here are the most common mistakes people trip over after any sort of building work.
- Dry Dusting and Regular Sweeping: Grabbing a broom or a feather duster might feel productive, but it actually stirs up fine post-construction air particles, sending them flying straight back into the air. What looks clean for five minutes? Not so clean an hour later.
- Vacuuming Without a HEPA Filter: Standard vacuums can’t trap the tiniest dust particles. If you don’t use a HEPA filter, you’re basically spreading those invisible particles around. Studies show regular vacuums recirculate up to 50% of the fine dust back into the air.
- Ignoring Air Vents and HVAC Filters: Builders’ dust sneaks into air ducts and lingers for ages. If you’re not replacing or at least cleaning your filters after construction, your HVAC will just keep pumping that indoor air quality nightmare throughout your whole house.
- Skipping Multiple Rounds of Cleaning: It’s a marathon, not a sprint. Trying to do everything in one go means you’ll miss the dust that settles back down later. You need at least two to three rounds—with days in between—to get ahead of it.
- Leaving Windows Open: You might think airing out the place helps, but if you’re anywhere near pollen season or heavy city smog, you’re inviting even more gunk inside while not getting rid of the after builders cleaning mess.
I’ve seen people toss open boxes of air purifiers thinking they’d zap all the dust. Problem is, even the best air purifiers need the right filter and size for your space—otherwise, it’s just a fancy fan. According to a 2022 survey, nearly 60% of homeowners who used undersized purifiers saw barely any improvement in home cleaning tips results after construction.
| Mistake | What Actually Happens |
|---|---|
| Regular Broom Sweeping | Stirs dust back into air |
| Skipping HVAC Filter Change | Spreads dust every time air runs |
| No HEPA Vacuum | Recirculates fine dust particles |
| One-Time Cleanup | Leaves behind settled dust |
The bottom line: if you want true dust removal after a renovation, the right gear and the right process make a difference. Shortcuts and old habits only make the mess last longer.