
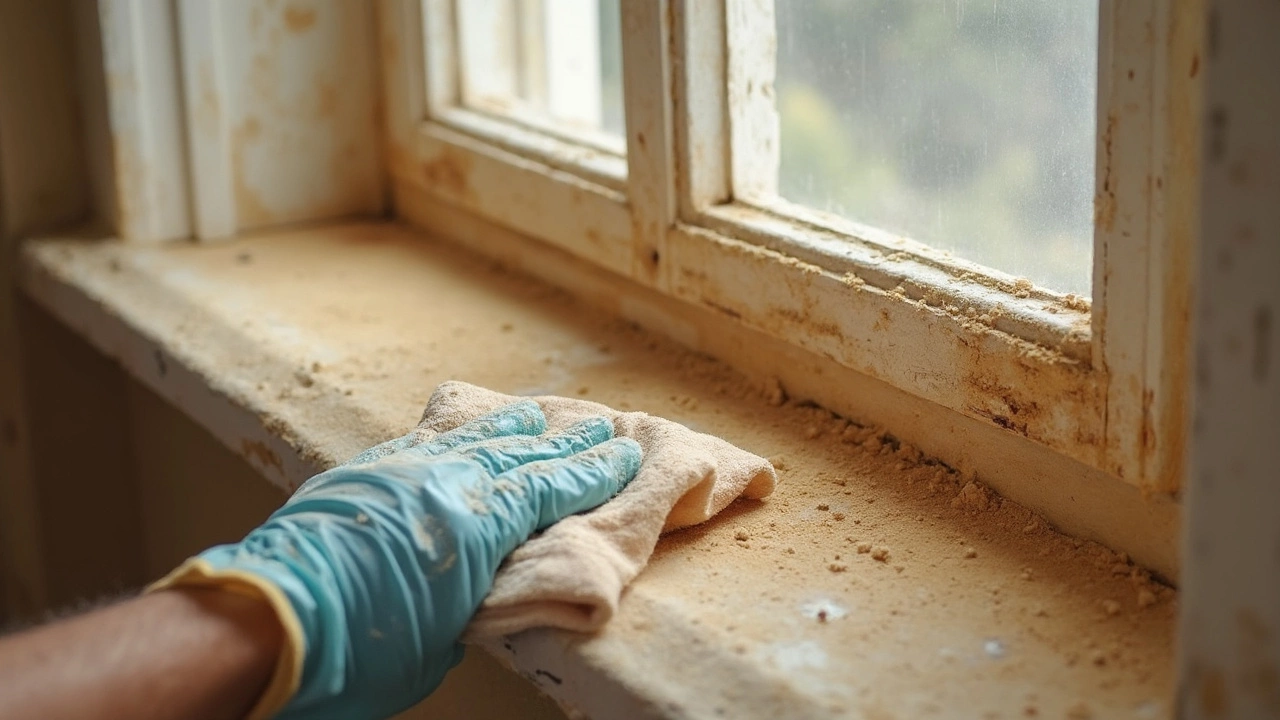
Ever notice that no matter how carefully the builders work, that fine, chalky dust finds its way everywhere? You rub your finger on a windowsill and there it is, days after the work is done. It’s not your usual household dust; this stuff gets into cracks you didn’t even know existed and clings to every surface.
If you’re tempted to just grab a dry duster, stop right there. Dry wiping only makes things worse—builders dust is mostly made up of plaster, concrete, even dried paint specks, and it floats right back into the air with the slightest swipe. Instead, grab a vacuum with a HEPA filter and a damp microfiber cloth—the right tools make all the difference.
Believe it or not, when I had my kitchen redone last summer, I learned quickly that working from top to bottom is key. Start high—think ceiling corners or ledges—because gravity is not your friend here. Knock the dust down, vacuum, then wipe.
- Why Builders Dust Is Such a Pain
- Tools and Supplies That Work Best
- Step-by-Step: Tackling Dust the Right Way
- Room-by-Room Cleaning Strategies
- Keeping Your Air and Surfaces Safe
- How to Deal with the Stuff That Won’t Budge
Why Builders Dust Is Such a Pain
Here’s the thing: builders dust is nothing like what you sweep up on a Saturday. It mostly comes from plaster, cement, brick, and drywall, which means it's full of fine particles and even sharp bits you can’t see. These aren’t just a hassle for cleaning—they’re tiny enough to get into your TV, your computer, and yes, even your lungs.
The big issue with after builders cleaning is that this dust floats around for ages. Open a window? The breeze just sends it right back into the air, and it settles again hours or days later. My kid Jasper once left a LEGO set out during some renovations, and even with it hidden in a box, every brick was covered in a soft, powdery layer for weeks.
Let’s talk about how stubborn it is. Builders dust almost locks itself onto rough surfaces—think unpainted walls, concrete, or woodwork. On top of that, it’s static, so you’ll find it clinging to glass, screens, and the sides of your appliances. Regular dusters just spread it around, and sometimes even vacuums will shoot some back into the room if they don’t have the right filter.
To put it in perspective, check out the kinds of particles you’re up against in builders dust:
| Type | Size (microns) | Where it comes from |
|---|---|---|
| Plaster | 0.5-5 | Walls, ceilings |
| Concrete/Cement | 1-10 | Floors, structural work |
| Sawdust | 10-30 | Wood, carpentry |
| Paint particles | <1 | Sanding, touch-ups |
If you try wiping surfaces without the right approach, it’s super easy to just scratch your stainless steel fridge or leave streaks on your freshly painted walls. Dealing with builders dust isn’t just a cosmetic issue—it’s about keeping the stuff out of your electronics, safe from your family’s lungs, and making the house actually feel clean again.
Tools and Supplies That Work Best
You won’t win the fight against builders dust with just a broom and hope. Trust me, using the right gear saves hours and headaches. Here’s what you need if you want that place truly clean:
- Vacuum with HEPA filter: Regular vacuums stir up fine dust, but HEPA filters trap tiny particles. That’s a big deal for after builders cleaning, especially if you’ve got kids or allergies.
- Microfiber cloths: Don’t even bother with paper towels or feather dusters. Microfiber catches dust instead of pushing it around. Slightly damp cloths work best—just don’t soak them or you’ll smear dust into a paste.
- Buckets and mops: Go for flat mops or microfiber pads. Old-school string mops just spread muddy water around, especially on tile or laminate.
- Protective gear: You’ll want dust masks (proper ones, not just a scarf) and maybe even goggles. Builders dust is rough on your lungs and eyes.
- Soft brushes: These help you get into corners, vents, and tiny cracks. An old, clean paintbrush works wonders for baseboards.
- Plastic sheeting and tape: If you still have work happening nearby, block rooms off with plastic and seal door gaps. No point in cleaning if new dust is flying in.
| Tool | Why It Matters |
|---|---|
| HEPA Vacuum | Traps 99.97% of particles 0.3 microns or bigger—the stuff regular vacuums miss |
| Microfiber Cloth | Picks up and holds fine dust, no streaks left behind |
Pour a little extra effort into your gear and you’ll get way better results. And unless you love cleaning the same spot twice, don’t skip the HEPA vacuum—it’s the one tool that actually makes a dent in stubborn builders dust.
Step-by-Step: Tackling Dust the Right Way
Trying to handle builders dust the same way you’d deal with a regular mess will drive you nuts. This stuff needs a plan. Don’t just start wiping at random—you’ll get better results if you follow a certain order.
- Wait for work to finish. Builders are experts at making a mess. If you start too soon, you’ll just have to do it all again. Wait for all major works – sanding, painting, drilling – to be done.
- Ventilate the area. Pop open all available windows and doors. Fresh air helps to clear that fine dust lingering in the air (and keeps you from breathing it in). If you’ve got a box fan, use it to blow dust out of the room.
- Pick the right vacuum. A basic home vacuum won’t cut it. Use a shop-vac or one with a HEPA filter. This traps even the really fine particles. Quick fact: HEPA filters can catch at least 99.97% of particles down to 0.3 microns in size.
- Vacuum from top to bottom. Start at the highest shelves or ledges and work your way down. That way, you aren’t sending more dust onto surfaces you just cleaned.
- Wipe with a damp microfiber cloth. Microfiber traps dust instead of just moving it around. Always make the cloth damp, not soaked. Too much water will just smear the dust into a paste.
- Repeat the vacuum and wipe-down. One round isn’t enough for after builders cleaning. Expect to go over everything twice (sometimes even three times if you’re dealing with extra stubborn spots).
- Change vacuum filters often. They fill fast with post-construction dust and lose power. Check the filter after each room or major area.
| Vacuum Type | Captures Fine Dust? | Needs HEPA Filter? |
|---|---|---|
| Standard Upright | No | Recommended |
| Shop-Vac | Yes | Optional |
| HEPA Canister | Yes | Yes (built-in) |
Don’t forget the hidden spots—behind radiators, under kitchen units, and inside light fixtures. Builders dust always finds the sneakiest places to hide. Stick to this plan, and you’ll wipe out that annoying mess way faster.
Room-by-Room Cleaning Strategies
Not all rooms collect builders dust the same way, so it pays to adjust your after builders cleaning game plan depending on where you're working. Let’s break down what works best, room by room.
Kitchen dust can stick to every surface, even the insides of your cupboards. Before you start, empty cabinets and drawers. Use a vacuum with a HEPA filter on floors and shelves—don’t skip under the appliances. Follow with a damp microfiber cloth to finish the job. For worktops and appliances, skip harsh chemicals if you have kids around. Warm water with a splash of dish soap is usually enough.
When you get to bathrooms, dust settles on tiles, taps, and inside those drawers you never use. Take everything out first. Spray tiles and counters with soapy water, let it sit for a minute, then wipe away with a soft cloth. Vacuum any vents or extractor fans—builders dust loves to collect there.
In living rooms and bedrooms, carpets and furniture can be a real dust trap. Use your vacuum’s upholstery tool on couches, beds, and especially cushions. Don’t forget curtains—take them down if you can and give them a wash or a good shake outside.
- Always clean light fixtures and fan blades—they collect a shocking amount of dust during construction.
- In rooms with hardwood or laminate, use a damp, never wet, mop. Too much water can damage the floors.
- Wipe down baseboards and window sills last, since dust will keep falling as you clean other areas.
Hallways and entryways might look clean, but they're the first places where everyone tromps in extra debris. If you can, place a doormat inside and outside the main entrance for a few weeks. This helps trap leftover builders dust from shoes.
Statistically, it can take up to five rounds of vacuuming before all the dust is gone, especially in homes with new carpeting. Stay patient and work one zone at a time—you’ll get there without wrecking your nerves or your back.
Keeping Your Air and Surfaces Safe
When builders dust spreads out, it’s more than just annoying—it can actually mess with your breathing and make surfaces feel gritty long after the job’s done. That’s why really getting rid of builders dust isn’t just about looks. It’s about making your home safe for everyone, especially if anyone at home is sensitive to dust.
The first thing—don’t let the dust float around. A good vacuum with a HEPA filter can trap those super-fine particles so they don’t end up right back in your air. Regular vacuums without proper filters might just blow the dust back out. Trust me, if you skip this step your place will never feel truly clean.
- Use a HEPA-filtered vacuum first; sweepers and cheap shop-vacs can actually make the problem worse.
- After vacuuming, always go over hard surfaces with a damp microfiber cloth. You want it damp—not wet—so it pulls in the dust instead of smearing it around.
- Wash any soft furnishings—curtains, pillow covers, throws—since dust settles into fabrics and releases back into the room every time you sit or move them.
- If you have air purifiers, crank them up and keep windows open (if possible) while you clean. It’s been shown that running an air purifier with a HEPA filter reduces lingering airborne dust by up to 80%.
Builders dust can have tiny fragments of drywall, silica, and plaster. Breathing in these tiny particles isn’t great for anyone, and for kids, it’s even worse. My son Jasper once started coughing after a half-hearted clean, so I learned to not cut corners. Don’t forget about air vents and HVAC filters—swap those out or clean them, because they trap a surprising amount of dust and can keep blowing it back in.
| Cleaning Method | Dust Particle Removal (%) |
|---|---|
| Standard vacuum | 35% |
| HEPA vacuum | 85% |
| Damp wiping | 90% (on hard surfaces) |
| Air purifier (HEPA) | 80% (airborne) |
If you’re handling major after builders cleaning, don’t forget to gear up: wear a mask and maybe even goggles. It might look silly, but your lungs will thank you. Safe air and spotless surfaces don’t just happen—you’ve got to take a few smart steps to make it real.
How to Deal with the Stuff That Won’t Budge
Even after your best builders dust blitz, some gritty spots just won't move. You wipe and scrub, but there’s still that chalky film stubbornly hanging on tiles, floors, or window frames. Don’t panic—this gunk needs a smarter attack plan, not brute force.
First, forget dry scrubbing. For thick dust layers or hardened bits, start by slightly dampening the area. If it’s tile or a hard surface, mix a couple drops of dish soap with warm water and let your microfiber cloth sit on the spot for a minute before wiping. This softens grout dust, dried plaster, and caked-on residue. Still stuck on tough stains? Use a plastic scraper—not metal—to gently lift the stubborn chunks. Never go in with a regular sponge, since it just smears the builders dust around or worse, grinds it into the surface.
If you’re facing stuck dust in odd places (think radiators, baseboard grooves, tracks on sliding doors), grab a small old toothbrush or a paintbrush. Moisten it, and brush out the dust gently. This works wonders for awkward corners where cloths can’t reach.
On glass windows or mirrors, that cloudy finish can hang around even after several wipes. Go with a 1:1 mix of white vinegar and water. Spray, wait a few seconds, and buff clean with a dry microfiber cloth. If the problem remains, hit it again—but don’t ever use abrasive pads because they’ll leave scratches that don’t come out.
For wooden floors or delicate surfaces, only use specialized wood cleaners after vacuuming with a brush-head attachment. Steer clear of soaking these surfaces; too much water warps wood over time. If you spot powder packed into wood grain or cracks, vacuum using the crevice tool and then gently wipe with a just-damp (not wet) cloth.
Here’s a cheat sheet for stubborn dust removers that actually work:
- Microfiber cloths (damp, not soaking)
- Plastic scrapers for thicker bits
- Spray bottle with white vinegar & water (for glass and mirrors)
- Old toothbrushes for tight spaces
- HEPA vacuum with brush & crevice attachments
- Specialist wood cleaners for fragile surfaces
A study by the UK Building Research Establishment found that HEPA vacuums capture about 99.97% of fine dust particles, so always use that over sweeping when possible. Here’s how some techniques stack up for typical post-construction tough spots:
| Spot | Best Tool | Extra Tip |
|---|---|---|
| Tile grout/Edges | Toothbrush, dish soap | Let sit wet for a few minutes |
| Window tracks | Paintbrush, vacuum | Finish with a damp cloth |
| Glass & Mirrors | Vinegar-water spray | Buff with microfiber only |
| Wood floors | HEPA vacuum, barely damp cloth | Avoid standing water |
If you’re dealing with stuff that feels more like cement, like dried plaster blobs, you might need to call in pro after builders cleaning services. They have purpose-made solvents and machines that can lift residue without damaging your surfaces. But for 90% of stubborn builders dust, these simple tweaks usually do the trick—even when you think it’s hopeless.